|
|
Photographs
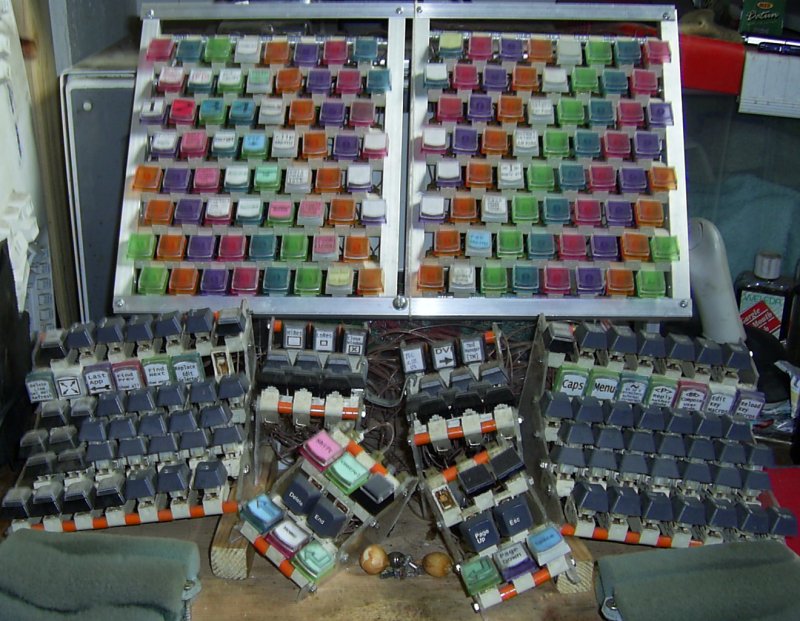
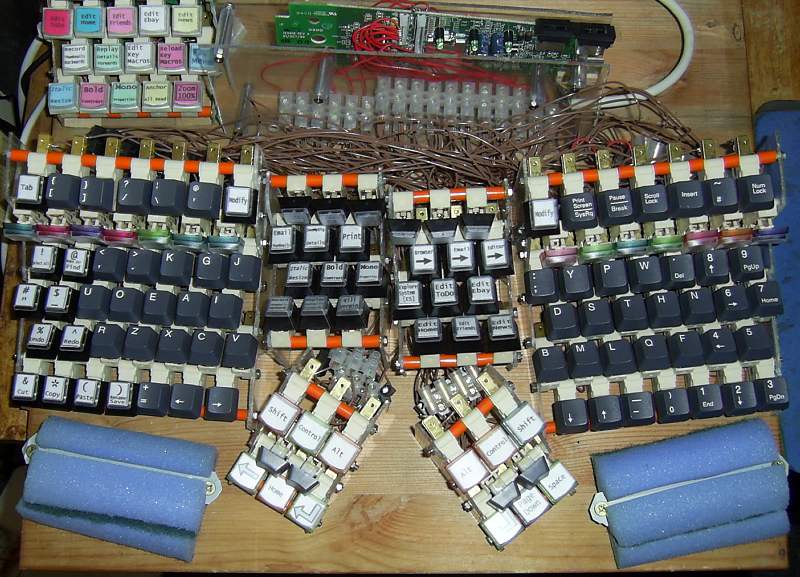
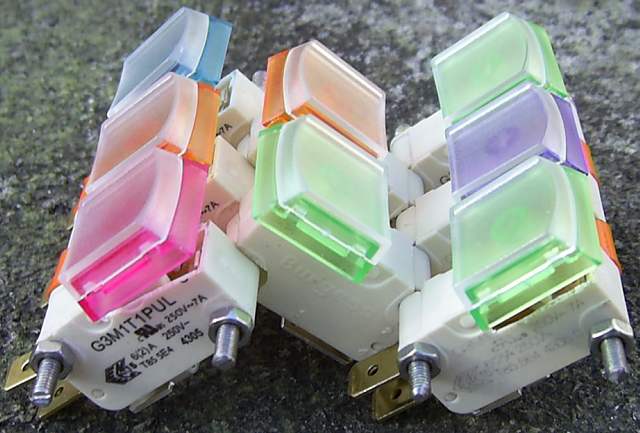
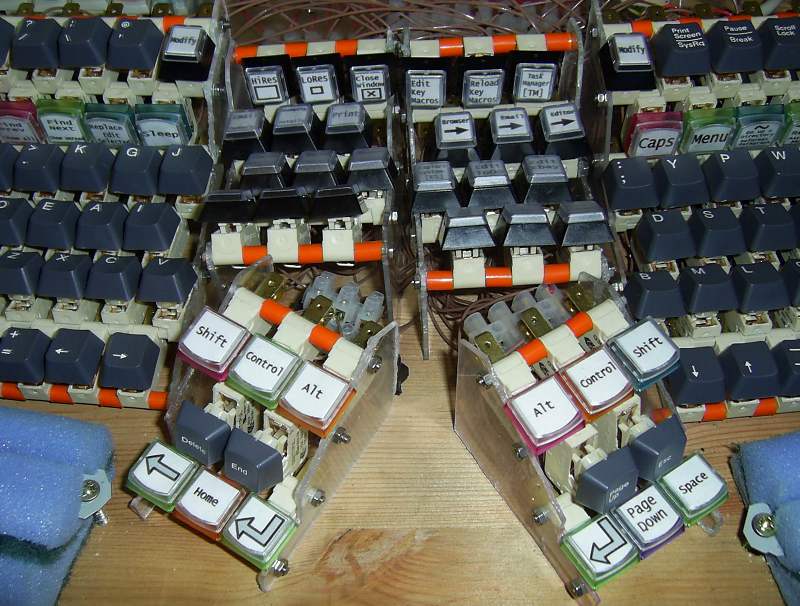
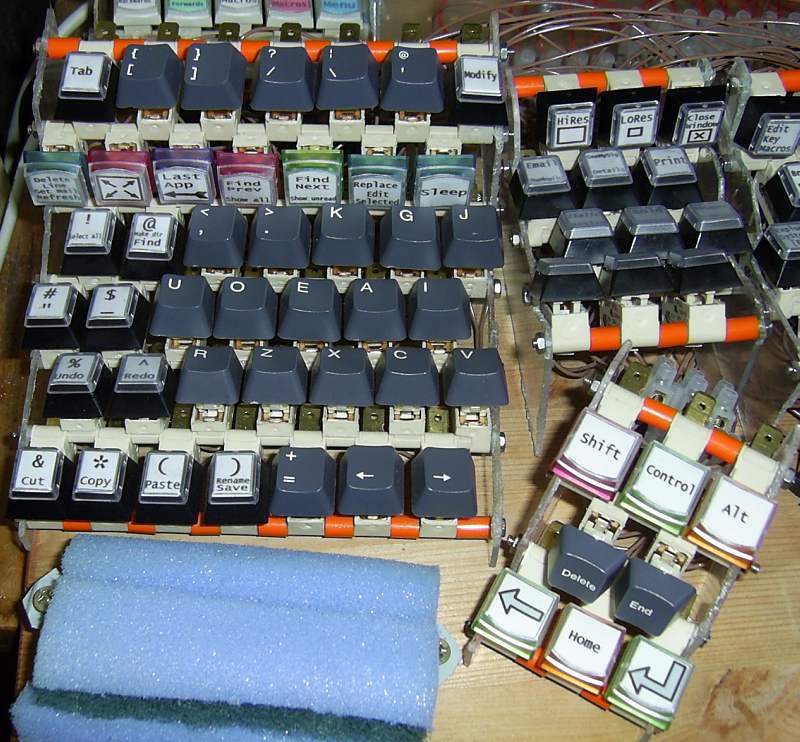
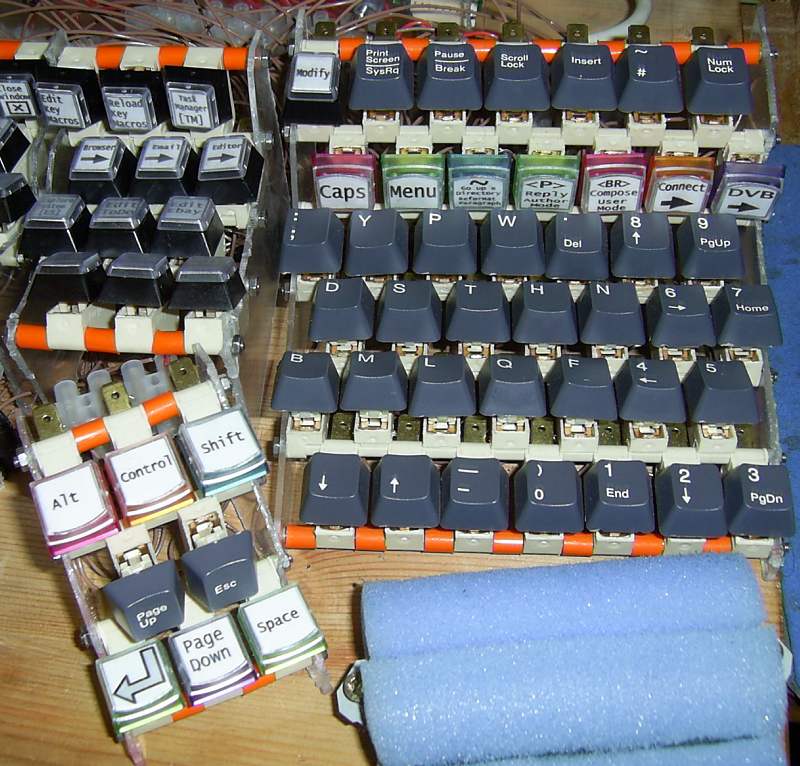
Microswitch keyboardI've constructed a 124-key microswitch keyboard.This uses Saia-Burgess low force microswitches - the best keyswitches I've been able to find so far. The overall key layout is like the Kinesis and Maltron keyboards. The actual alphanumeric arrangement used owes much to my previous Kinesis layout. As a bit of an experiment, I attempted to spread the keying load between flexor and extensor muscles - by positioning some of the switches in an inverted position - like this:
I got the idea for doing this from DataHand devices. The inversion works well on the thumb boards - but is rather less effective on the finger boards.
VideoMy keyboard
Activation forcesThe activation force on the keys of this keyboard is around 10cN.This is the first full keyboard constructed using this technology. With the previous keypads the side effects of low activation forces were relatively minimal. However, with a full keyboard, the drawbacks of having such low activation forces begin to show up. It is normal to rest some weight on the fingers during typing. The need to lift fingers from the keyboard to avoid pressing keys seems likely to generate a fairly continuous low-level stress. Typists spend a lot of their time doing this anyway - and so far additional stress is not noticable. Touch typing demands that the fingers feel their way to the correct positions to some extent. Though the activation force on the keys is very low, they still have a couple of millimeters of travel - and it remains reasonably practical for fingers to feel the locations of the keys without actually pressing them. Another problem is accidental keypresses. These tend to be caused by reaching for one key without fully retracting the other fingers. These drawbacks would become increasingly severe if the activation forces were reduced further - and could be alleviated by increasing them somewhat. However, higher activation forces would inevitably cause more tissue damage. On balance, 10cN seems to be about right.
DIYIf you are interested in this type of keyboard, you will probably find you have to build it yourself.
EquipmentI constructed this keyboard using M3 studding, 2mm clear polystyrene sheet, switches, wire - and considerable patience.Elecrical tools used included a jigsaw, a drill and a soldering iron. Hand tools used included wire strippers, pliers, a junior hacksaw, a file, a vice and a penknife.
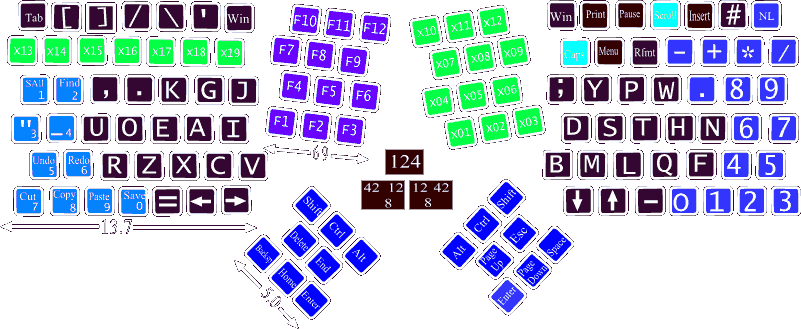
LayoutThe layout of the keyboard is as illustrated in this diagram:
Keyboard hackThis keyboard is a great input device. However, it is also a bit of a hack.Currently, this site illustrates what appears to be needed to obtain a good-quality computer input device, that is relatively safe to use. However, it is my hope that future keyboard designers will take the switches I used for a test drive - and find a way to use similar devices in their products.
More photographs
Construction photographsA selection of construction photos are available.
LinksThis siteFrom here you can go back to my keyboard page.
|